
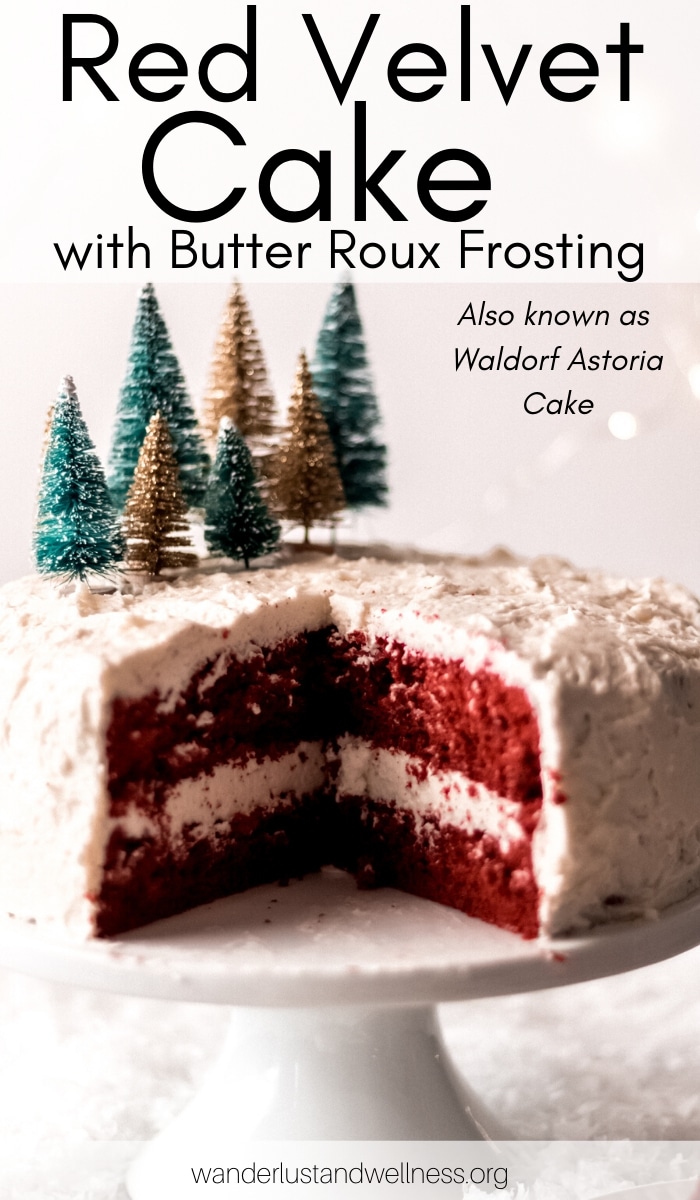
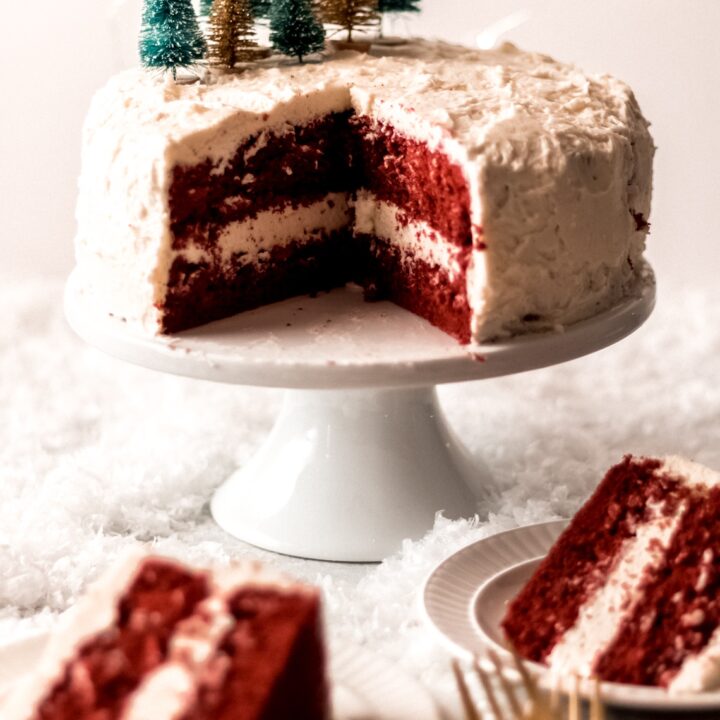
Dazzle your guests with a gorgeous red velvet cake with butter roux frosting. Known by many as Waldorf Astoria cake, it’s the butter roux or ermine frosting that sets this cake apart from the more commonly known cream cheese version. Once you have this red velvet cake you’ll never go back!
This red velvet cake with butter roux frosting is my birthday cake request every year. Except I never knew it was called butter roux frosting and I also never knew it wasn’t like the more well-known red velvet cake with cream cheese frosting. So you can imagine my horror when I first tried red velvet cake outside of the home to wonder who in the world ruined my cake with cream cheese frosting?!?
Ingredients Needed
To make this red velvet cake with butter roux frosting, you’ll need the following ingredients. Note that in this recipe we’re taking a shortcut and using a boxed red velvet cake mix.
- 3 Tbsp. flour
- 1 cup whole milk
- 1 box Duncan Hines Red Velvet cake mix
- 1 cup butter – softened
- 1 cup white granulated sugar
- 1 tsp. pure vanilla extract
How to make red velvet cake with butter roux frosting
- In the top pan of a double boiler, combine the flour and milk and whisk until smooth. Cook over boiling water, stirring frequently until the mixture is thick and custard-like. Cover immediately with plastic wrap, pushing the wrap down to cover the top layer of the mixture to prevent a top film from forming. Let cool completely.
- Bake cake mix per box directions for two 8-inch round cakes. Once finished baking, let cool for 15 minutes, then transfer to a cooling rack to finish cooling.
- While the cakes are cooling, begin to make the butter roux frosting. Make sure the roux is completely cooled. In a large stand mixer bowl, cream the softened butter for 4 minutes on medium speed. Add the sugar and beat for 4 minutes on medium speed. Add the milk mixture and vanilla and beat for 4 minutes on medium speed. Refrigerate until you are ready to ice the cake.
- First, you’ll add just a dab of the frosting to the center of your cake stand. This helps keep the bottom layer in place.
- Next, place one of the cake layers onto the cake stand with the flat side on the stand. Add a big dollop of frosting on top of the bottom layer (about 1 cup) and spread the frosting evenly over the top of the cake out to the edge. You can have a slight bit of overhand of frosting, which will help when icing the sides of the cake.
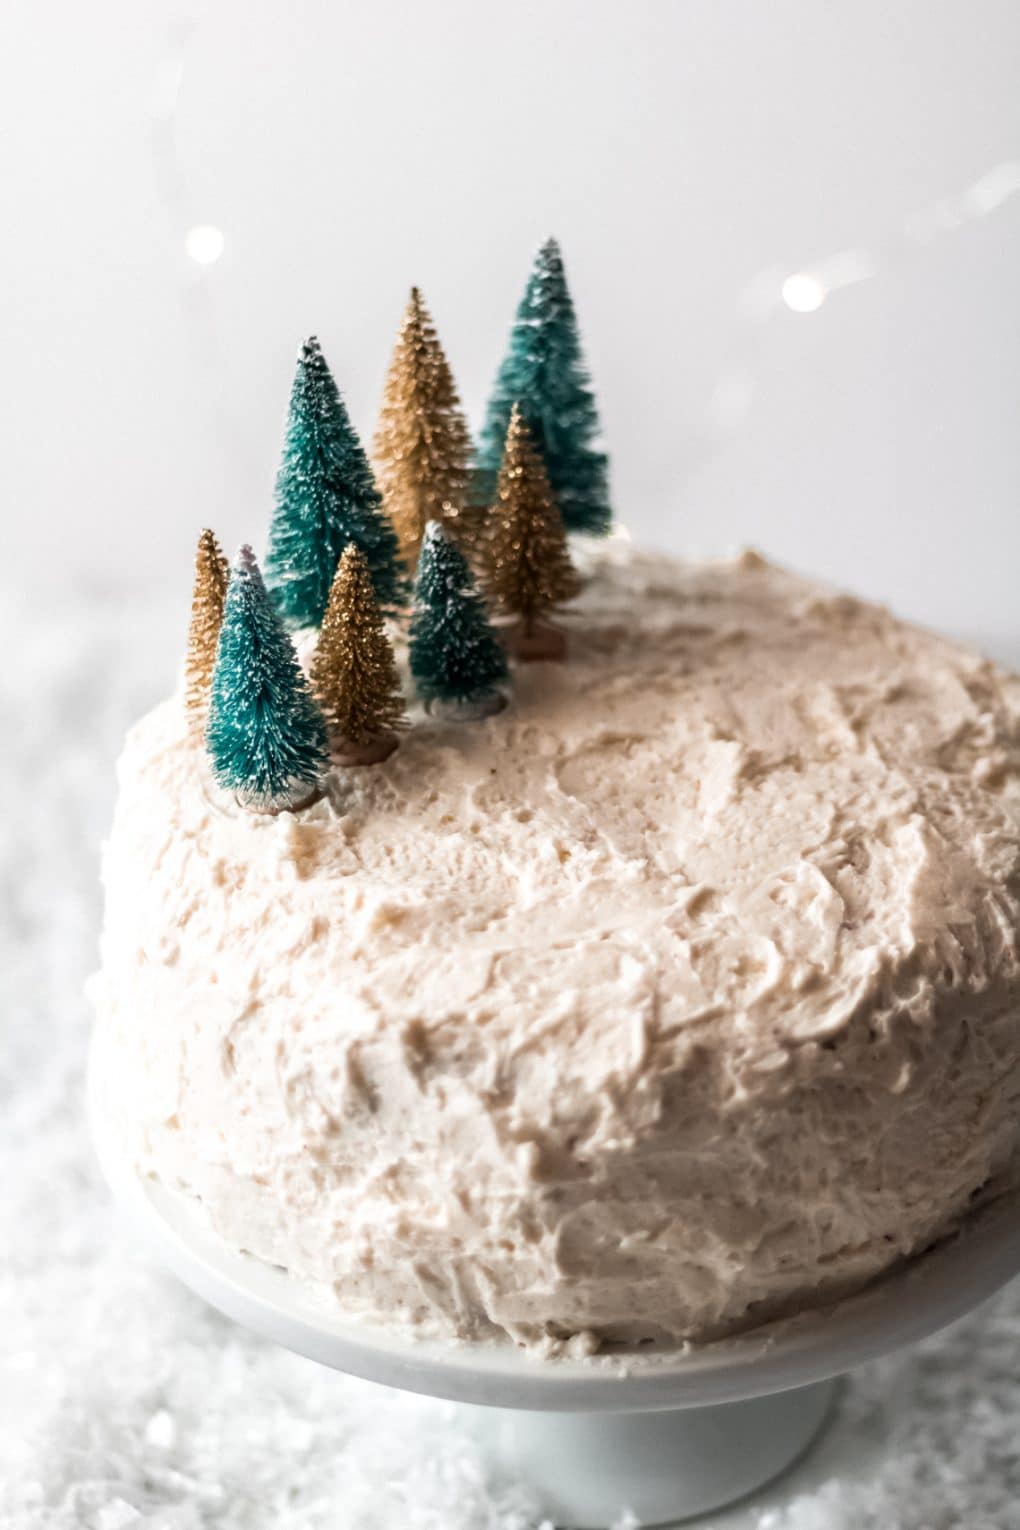
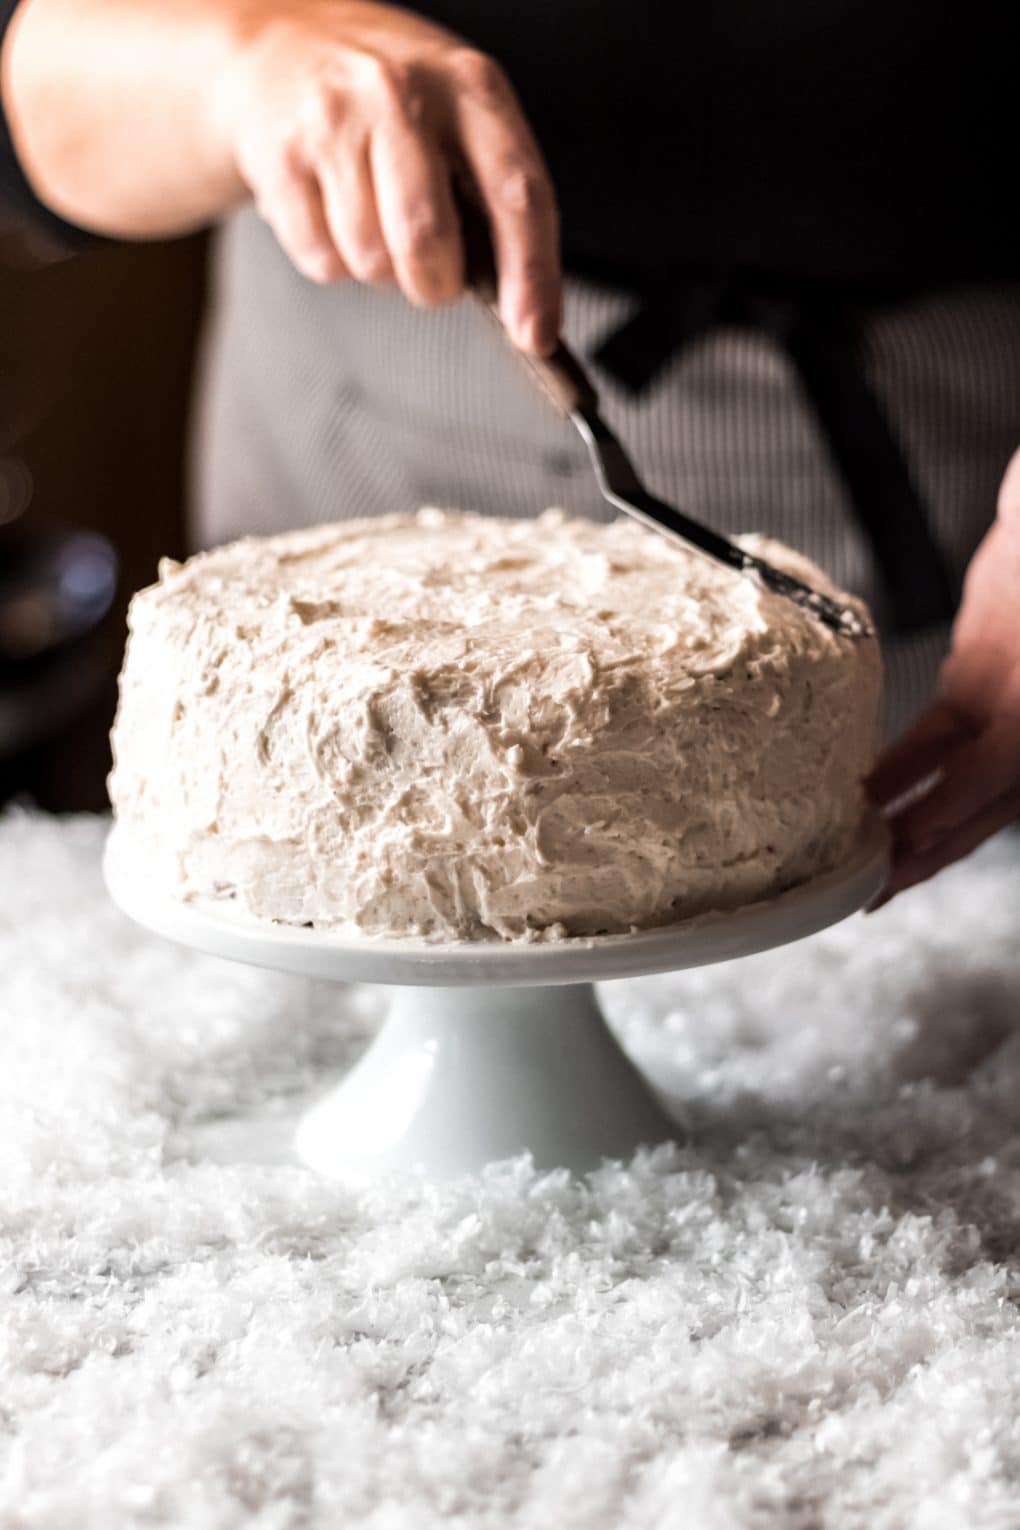
- Next, place the second layer of cake onto the frosting and gently press it down just to make sure it sticks. From here, frost a thin layer of frosting all of the cake, top and sides. This will help seal in the crumbs, also known as a crumb coat. Once you have your crumb coat, begin to frost the cake from the top then down the sides. Be generous with your frosting, continuing to smooth as you go around the cake.
- Refrigerate until ready to serve.
If you’re baking this cake for the holidays, get festive with your decorations. I added a few miniature bottle brush trees giving it a classic holiday feel. I’ve also added red sugars or gold sprinkles. It’s such a gorgeous cake for the holiday season, get festive!
Recipe FAQs
What is Waldorf Astoria Cake?
To me, red velvet cake with butter roux frosting IS the only red velvet cake I’ve ever known. Now that my profession is cooking and food photography, I’ve realized that this cake, a treasured family heirloom, is known by another name, the Waldorf Astoria Red Velvet Cake. The Waldorf Astoria Hotel in New York City claims to be the birthplace of the original red velvet cake.
What is red velvet cake?
Contrary to popular belief, red velvet cake isn’t just chocolate cake with red food coloring. There’s a long history surrounding red velvet cake, and I’ll spare you the long version. However, the short of it is that the red coloring is a result of the chemical reaction between cocoa powder, vinegar, and buttermilk, all of which are ingredients in the traditional cake recipe. Around the 1940s, the recipe evolved to essentially adding red food coloring to
What is butter roux frosting?
Never heard of butter roux frosting? Don’t worry, neither had I until I sat down to research what in the world this glorious icing was that I had eaten for so many years. Also known as ermine icing, or boiled-milk frosting, butter roux frosting consists of making a roux of milk and flour and then double-boiling it until it becomes custard-like. Then, it’s mixed with butter, sugar, and vanilla. It’s also best refrigerated as it’s mostly butter. You’ll never want to go back to cream cheese frosting on your red velvet cake again.
Does red velvet cake need to be refrigerated?
Yes, because of the butter roux frosting, you’ll want to keep this cake refrigerated and serve cold. You can refrigerate in an air-tight container for up to one week.
Recommended kitchen resources for this recipe
Enjoy these other dessert recipes!
- Red Velvet Whoopie Pies – easy red velvet whoopie pies with a rich vanilla buttercream
- Pumpkin Olive Oil Cake – a deliciously moist pumpkin cake with a maple glaze
- Blood Orange Olive Oil Cake – perfect for springtime
- Apple Upside-Down Cake – an apple twist to this classic cake
Red Velvet Cake with Butter Roux Frosting
Dazzle your guests with a gorgeous red velvet cake with butter roux frosting. Known by many as Waldorf Astoria cake, it's the butter roux or ermine frosting that sets this cake apart from the more commonly known cream cheese version.
Ingredients
- 3 Tbsp. flour
- 1 cup whole milk
- 1 box Duncan Hines Red Velvet cake mix
- 1 cup butter - softened
- 1 cup white granulated sugar
- 1 tsp. pure vanilla extract
Instructions
- In the top pan of a double boiler, combine the flour and milk and whisk until smooth. Cook over boiling water, frequently stirring until the mixture is thick and custard-like. Cover immediately with plastic wrap, pushing the wrap down to cover the top layer of the mixture to prevent a top film from forming. Let cool completely.
- Bake cake mix per box directions for two 8-inch round cakes. Once finished baking, let cool for 15 minutes, then transfer to a cooling rack to finish cooling.
- While the cakes are cooling, begin to make the butter roux frosting. Make sure the roux is completely cooled. In a large stand mixer bowl, cream the softened butter for 4 minutes on medium speed. Add the sugar and beat for 4 minutes on medium speed. Add the milk mixture and vanilla and beat for 4 minutes on medium speed. Refrigerate until you are ready to ice the cake.
- First, you'll add just a dab of the frosting to the center of your cake stand. This helps keep the bottom layer in place.
- Next, place one of the cake layers onto the cake stand with the flat side on the stand. Add a big dollop of frosting on top of the bottom layer (about 1 cup) and spread the frosting evenly over the top of the cake out to the edge. You can have a slight bit of overhand of frosting, which will help when icing the sides of the cake.
- Next, place the second layer of cake onto the frosting and gently press it down just to make sure it sticks. From here, frost a thin layer of frosting all of the cake, top, and sides. This will help seal in the crumbs, also known as a crumb coat. Once you have your crumb coat, begin to frost the cake from the top, then down the sides. Be generous with your frosting, continuing to smooth as you go around the cake.
- Refrigerate until ready to serve.
Notes
- Because of the butter roux frosting, you'll want to refrigerate this cake for up to one week.
- Nutritional Disclaimer

Jennifer is the recipe developer and food photographer behind Wanderlust and Wellness since 2016. She creates easy, approachable gluten-free recipes for the everyday home cook; because cooking gluten-free doesn’t mean food has to be complicated or tasteless.
What a gorgeous cake and it sounds absolutely delicious! I’m excited to be featuring your post this week at our Tuesday Turn About Link Party and so happy you shared your recipe with us!